
shockwave 3D Lingo
 Director supports
real-time 3D, allowing you to create sophisticated interactive 3D environments.
Complex models are usually built in a program like 3DS Max. In the last
tutorial, we saw how we could create 3D text with Director's text extrusion
tool. In this tutorial, we will create 3D in Director using Lingo alone.
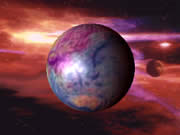
We'll create a primitive sphere to represent the earth, we'll apply texture
mapping and we'll create 3D animation.
Director supports
real-time 3D, allowing you to create sophisticated interactive 3D environments.
Complex models are usually built in a program like 3DS Max. In the last
tutorial, we saw how we could create 3D text with Director's text extrusion
tool. In this tutorial, we will create 3D in Director using Lingo alone.
We'll create a primitive sphere to represent the earth, we'll apply texture
mapping and we'll create 3D animation.
In this tutorial, you'll be introduced to 3D Lingo. With 3D, there are often lots of parameters associated with each command with their own unique names and syntax. It can get a little overwhelming. So be prepared. Don't worry about remembering every parameter and every command. This will come with practice (and there's always the Lingo dictionary to refer to).
Creating and Controlling 3D with Lingo
1. We will start with an existing file, shock3D.dir,
which has 2 images we will use later. Download the file and open it in Director.
2. Create a 3D cast member by choosing Insert > Media Element
> Shockwave 3D. The Shockwave 3D Window opens. Name this member
Scene.
The cast member you just created is a 3D world. At the moment, it includes
1 camera and 2 lights as by Director's default settings, but no 3D model.
3. Place the 3D cast member into channel 1 of the Score.
4. Create a new sprite behavior for the 3D sprite as follows:
property p3DmemberĀĀ
-- reference to the 3D member
property pSphereĀĀ--
reference to the sphere model
on beginSprite me
Ā -- define the 3D cast member
Ā p3Dmember = sprite(me.spriteNum).member Ā
Ā -- reset the 3D world
Ā p3Dmember.resetWorld()
end
We start by defining 2 properties for this behavior (each named with a
p prefix to identify them as properties). One references
the 3D cast member (p3Dmember), and the other is a reference
to the sphere we'll create later. We're using a beginSprite
handler so that the behavior will only activate the first time the sprite
appears in the Score.
p3Dmember = sprite(me.spriteNum).member
We define p3Dmember as above instead of directly referring
to the cast member as member("Scene"). The generic
reference makes the script reuseable and generally more flexible.
resetWord() is a 3D Lingo command, which 'cleans out' the
3D member. It tells the 3D world to start from scratch (revert to its original
state), removing any objects that may have been inserted through Lingo.
5. Before creating our 3D object (the sphere), we'll create a backdrop
to go behind it. A backdrop is a property that
allows us to place a static image in the background of our 3D world. This
image will be a texture map assigned to a camera.
Insert the following lines before the end statement
of your behavior you created earlier:
Ā -- create the backdrop of sky
Ā p3Dmember.newTexture("backdrop", #fromCastmember, \
member("sky"))
Ā p3Dmember.camera(1).insertBackdrop(1, \
p3Dmember.texture("backdrop"), point(0,0), 0)
newTexture is a 3D Lingo command that creates a new texture.
All textures must have a unique name. We gave our texture the name backdrop
. The #fromCastmember is the value of the #typeIndicator
parameter. #fromCastmember simply means the texture
is referenced to an image cast member. The texture could also be referenced
to another 3D object using #fromImageObject.
insertBackdrop is a 3D camera command. A camera can have
multiple backdrops so we have to define the position of this new texture.
In our case, we define the position (called index parameter) as 1. The parameters specified are:
1. Index parameter, 2. backdrop texture, 3. the locWithinSprite
parameter, 4. 2D location measured from the upper left corner of the sprite,
5. the rotation of the texture
6. Now we'll actually create the 3D model. Before creating the model,
we need to create a model resource. We'll call our model resource
SphereResource. We will use a variable also called
sphereResource to reference the model resource in the scene,
Continue adding the following lines to the script (after the last one and
before end):
Ā -- create the model resource for the
sphere
Ā sphereResource =
\
p3Dmember.newModelResource("SphereResource", #sphere)
newModelResource is a 3D command that creates a new model
resource of a particular #type. The #type
parameter can be one of the following primitives #plane, #box, #sphere,
#cylinder, #particle. An additional parameter can be added called
#facing. This defines if the mesh is generated for front
or back only, or both. If you have mesh for front and back, you can have
separate shaders for each.
7. A model resource has its own unique properties depending on the
type of resource it is. A sphere has a radius property. Add:
Ā sphereResource.radius = 50
8. Next we create a model using the variable pSphere to refer to it.
Ā -- create the model
Ā pSphere = p3Dmember.newModel("sphere", sphereResource)
newModel is a 3D command that creates a new model with a
unique name, based on a model resource.
9. Now we'll create a texture for the sphere. If no texture is created and applied, the sphere will
appear with the default settings of a red and white checkerboard. We create a new
texture in the same way as we did for the backdrop, giving it a unique name,
called sphereTexture.
Ā -- create texture for sphere
Ā p3Dmember.newTexture("sphereTexture", #fromCastmember,\
member("earth"))
10. Unlike the backdrop, the texture for the sphere cannot be applied
directly to the model. First a shader must be created. The shader
defines what the side or face of a model looks like. We will call our shader
sphereShader.
Ā -- create shader for sphere
Ā p3Dmember.newShader("sphereShader", #standard)
Ā p3Dmember.shader("sphereShader").texture = \
p3Dmember.texture("sphereTexture")
Ā
newShader is a 3D command to create the look of a model
surface. Parameters include the shader name and the #shaderType.
The #shaderType could be #standard, #painter, #engrave,
#newsprint, each having their own properties and appearance.
11. To apply the shader to the model, we have to place it in the model's shaderList.
This is a linear list of shaders applied to a model. The number of items in the list relates
to the number of meshes in the model resource. Each mesh
has only one shader. Spheres have only one mesh so one shader covering the
entire surface.
pSphere.shaderList[1] = p3Dmember.shader("sphereShader")
shaderList is a 3D model property; a linear list of shaders
applied to the model
12. The last thing we will do is rotate the sphere. Add the following
lines after the end statement of the beginSprite
handler.
on exitFrame me
Ā -- rotate 1 degree per frame
Ā pSphere.rotate(0,1,0)
end
rotate is a 3D command that applies a rotation to a model
at angles related to the x, y and z axis.
13. Insert a pause script in frame 2 of the Score
(as below). Then rewind and play the movie.
on exitFrame me
Ā go the frame
end
Changing 3D properties from the Property Inspector
As you saw above, we can set properties of 3D members by Lingo. However,
there are some settings we can apply using the Property Inspector.
1. Click on the 3D cast member and open the Property
Inspector.
2. Under Director Light, experiment with changing the direction
of the light and playing the movie.
3. Experiment with changing the Directional and Ambient
colour.
The finished movie can be downloaded from here.